Stop DNS leaks with VPN connection
 Virtual Private Network is used for various reasons like increasing the security of the valuable information, unblocking any blocked sites and also for anonymity in online. These are done by the VPN service by encrypted the data to the different route than the ISP’s route. So no one can recognize and track the activity of you.
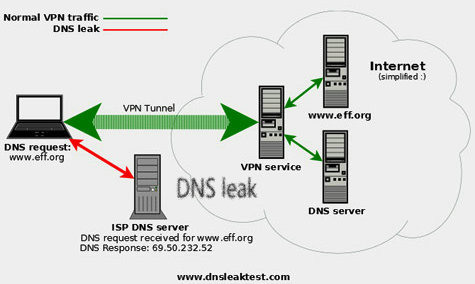
But the VPN server can not fully make your connection secure. The problem may be occurred due to having the DNS leaks. The DNS or Dynamic Name System translates the domain names into numerical form which we know as IP address. Normally while using the VPN the DBS request should follow the VPN provider’s DNS. But if there is any leak then it will also follow the ISP’s DNS server through which they can track your online activities. So then you are not secure and also the activity is not anonymous.
DNS leak or Not?
But the question is when will you get that your DNS is leaked?
You can check this very easily. You can find many sites where you can easily check your DNS whether it is leak or not.,such as www.dnsleaktest.com. If you are connected by a VPN and then if you find the IP addresses after the test that matches any of your known IP then your DNS is leaked. That means your ISP can track your activity.
If this happens then you need to take some steps to prevent the DNS leak. You can do this in various ways.
How to prevent a DNS leak
>>You can use any VPN service from a client who has got DNS leak protection built in their system. You just leaving it check and it will give your DNS more protection. This is the simplest way of protecting the DNS. There are only a few VPN service providers give this service.Such as Private Internet Access – Settings/DNS Leak Protection.TorGuard – Automatic.
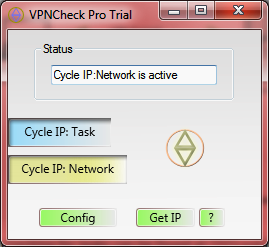
>>You can also use the VPN check pro. This is a software which you need to use after installing this in your PC. Sometimes you may need to cost for using the service.

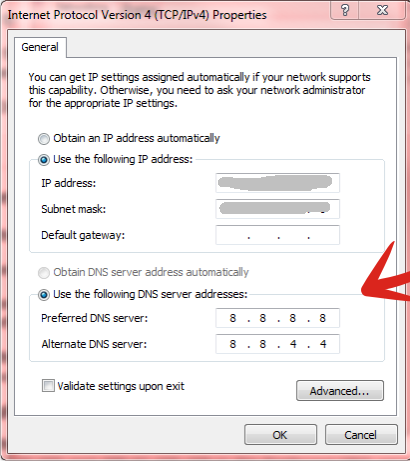
>>Manually you can change your DNS servers and can make your IP address static. To set this up you need to go to the network and sharing centre from control panel. Then go through the property and find out the IPv4. Again by going through the property you will find many existing DNS servers. You will make a note which will be used in future. public DNS server such as those offered by
Google Public DNS Setting :

Preferred DNS server: 8.8.8.8
Alternate DNS server: 8.8.4.4
Comodo Secure DNS Setting :
Preferred DNS server: 8.26.56.26
Alternate DNS server: 156.154.70.22
Open DNS Setting :
Preferred DNS server: 208.67.222.222
Alternate DNS server: 208.67.220.220
>>You can use the DNS of your VPN service provider. You can make it static for further use. When you have gone through all the processes you can use the connection free from leaking.


No Comments